开发工具:
VS2010
Blend
Prism框架
基本概念:
数据绑定,依赖属性,依赖对象
WPF 委托式命令 Icommand接口
Lambda表达式
MVVM(Model-View-ViewModel)介绍:
{
View=UI;
Model=抽象事物;
Viewmodel=Model for View;即View的建模
}
ViewMode与前台View传递的方法
{
传递数据-数据属性(双向)
传递操作-命令属性(单向,只能从View传递给ViewMode)
}
开闭原则(OCP):对于扩展是开放的(Open for extension)
对于修改是关闭的(Closed for modification)
也就是说,如果项目使用了MVVM模型,前台UI和后台代码是完全分离的,也就是说,不管前台的界面如何根据客户需求而改变,只要前台界面没有本质改变,也就是说,前台界面的输入输出映射关系没有改变,那么后台代码就是不用修改的。
后台代码应该完全与前台界面元素无关,也不引用前台界面元素的属性。后台代码只实现业务逻辑,实现与前台的分离。
通过实现INotificationt将数据的改动传递给Binding,来改变View,实际上就是Binding在监听着ViewModel是否有改变。
例子:
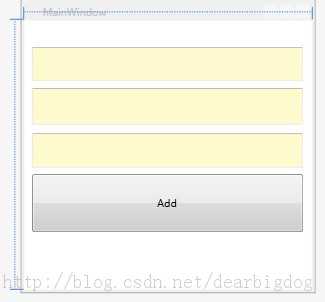
为了简单起见,下面的代码只实现最简单的功能,没有异常判断。按钮Add实现两个TextBox相加,并将加和显示在第三个TextBox上
Xaml实现该界面较为简单,这里不赘述。
上文中提到,使用MVVM模型应当使界面与后台代码解耦。如何实现呢?
数据属性定义:
|
1
2
3
4
5
6
7
8
9
10
11 |
class
NotificationObject : INotifyPropertyChanged{ public
event PropertyChangedEventHandler PropertyChanged; public
void RaisePropertyChanged(string
propertyName) { if
(this.PropertyChanged != null) { this.PropertyChanged.Invoke(this, new
PropertyChangedEventArgs(propertyName)); } }} |
首先我们实现了NotificationObject 类,这个类派生自INotifyPropertyChanged这个接口,用来向客户端发出某一属性值已更改的通知。
这个接口中有一个PropertyChanged事件,在更改属性值时发生。我们在此类中实现RaisePropertyChanged()方法,用来对此事件进行封装。Sender=this指向自己。EventArgs=new PropertyChangedEventArgs(propertyName) 用来告诉Binding具体哪个属性发生了改变。这里即propertyName。
这个类就是ViewModel的基类。
命令属性定义:
|
1
2
3
4
5
6
7
8
9
10
11
12
13
14
15
16
17
18
19
20
21
22
23
24
25 |
class
DelegateCommand:ICommand{ public
bool CanExecute(object
parameter) { if
(this.CanExecuteFunc==null) { return
true; } return
this.CanExecuteFunc(parameter); } public
void Execute(object
parameter) { if
(this.ExecuteAction==null) { return; } this.ExecuteAction(parameter); } public
Func<object,bool> CanExecuteFunc { get; set; } public
Action<object> ExecuteAction { get; set; } public
event EventHandler CanExecuteChanged;} |
我们实现了一个名叫DelegateCommand的委托命令。派生自ICommand接口。这个接口主要有两个方法,bool CanExecute(object parameter)和public void Execute。
我们自己声明一个Action类型的属性ExecuteAction,ExecuteAction是一种委托。并在Execute中调用它。
相当于我们把DelegateCommand这个命令所要执行的的事情委托给了ExecuteAction这个委托所指向的方法。
好了,抽象出来的ViewModel已经完成了。
下面我们来实现开头提到的,按钮Add实现两个TextBox相加,并将加和显示在第三个TextBox上
我们需要两个数据属性Input1,Input2来进行法,一个数据属性来存储加和 Result。
同样我们还需要一个命令属性来进行加法命令。
整理出这些,我们就可以MainWindow建立它的ViewModel类,代码如下
|
1
2
3
4
5
6
7
8
9
10
11
12
13
14
15
16
17
18
19
20
21
22
23
24
25
26
27
28
29
30
31
32
33
34
35
36
37
38
39
40
41
42
43
44
45
46
47
48
49
50
51 |
class
ViewModelMainClass : NotificationObject { private
double input1; public
double Input1 { get
{ return
input1; } set { input1 = value; this.RaisePropertyChanged("Input1"); } } private
double input2; public
double Input2 { get
{ return
input2; } set { input2 = value; this.RaisePropertyChanged("Input2"); } } private
double result; public
double Result { get
{ return
result; } set { result = value; this.RaisePropertyChanged("Result"); } } public
DelegateCommand AddCommand { get; set; } private
void Add(object
parameter) { this.Result = this.Input1 + this.Input2; } public
ViewModelMainClass() { this.AddCommand = new
DelegateCommand(); this.AddCommand.ExecuteAction=new
Action<object>(this.Add); } } |
如上所示,Input1,Input2,Result用来存储加法的两个数及其求和结果,同样我们定义了命令AddCommand,用来进行求和。
在构造函数中,我们为属性AddCommand新建一个DelegateCommand实例,然后为ExecuteAction委托添加Add方法。
到此为此,我们的工作已经是完成了。编译通过。下面要做的工作就是在前台界面上将前台界面元素的属性绑定上去,就OK了。
代码如下:
|
1
2
3
4
5
6
7
8
9
10
11 |
<Window x:Class="WpfMVVM.MainWindow" Title="MainWindow"
Height="350"
Width="350"> <Grid> <TextBox Text="{Binding Input1}"
x:Name="tb1"
Height="60"
Background="LemonChiffon"
Margin="10,0,10,240"/> <TextBox Text="{Binding Input2}"
x:Name="tb2"
Height="60"
Background="LemonChiffon"
Margin="10,70,10,180"
/> <TextBox Text="{Binding Result}"
x:Name="tb3"
Height="60"
Background="LemonChiffon"
Margin="10,140,10,120"/> <Button x:Name="bt1"
Command="{Binding AddCommand}"
Margin="0,240,0,0">Add</Button> </Grid></Window> |
最后,我们为Window设置DateContext,绑定会自动去查找并设置为自己的Source
|
1
2
3
4
5 |
public
MainWindow(){ InitializeComponent(); this.DataContext = new
ViewModelMainClass();} |
再次编译,运行,可以看到:
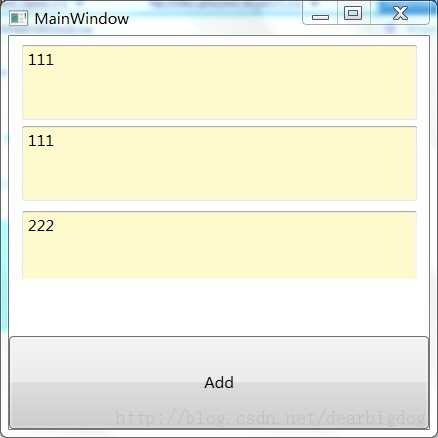
代码下载:http://download.csdn.net/detail/wudidagou/6324185
Prism - WPF MVVM(Model-View-ViewModel)设计模式【学习】,布布扣,bubuko.com
Prism - WPF MVVM(Model-View-ViewModel)设计模式【学习】
原文:http://www.cnblogs.com/cw_volcano/p/3613484.html